Help & Advice
Fixing Wall Cracks and Dents
Help & Advice
Fixing Wall Cracks and Dents
Cracks and dents can appear in your walls as weather conditions change throughout the year. They form when the temperature goes up and down too quickly. And they're ugly. They bring down how your home looks. Worse, they bring down how your home feels. They make day-to-day living uncomfortable. If you're looking for a simple, easy wall repair guide you've come to the right place.
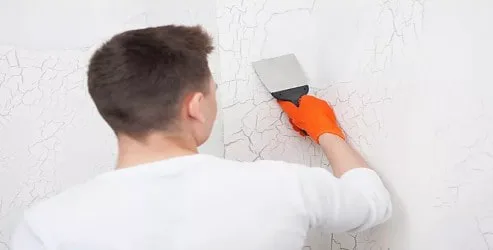
Step 1: Make the crack a little deeper
This may sound strange but it's necessary for a wall repair solution that will last. Making the crack or dent a little deeper will let you get to the loose concrete, flaked paint, age-old filler, dust or debris trapped in the gap. Using a scraper or even a screwdriver, open the crack a little by applying pressure along the line of the crack. Using a cloth or brush, clean out the old junk inside the gap. You can even use a vacuum to suck it out. A clean opening will help the filler stick more firmly later on.
Step 2: Prepare your filler
There are many kinds of fillers on the market, some of which come pre-mixed. Others come in the form of a powder which you'll need to mix with a liquid. How much filler you need will depend on how big the crack or hole you're trying to cover up is. Stir the filler powder with water until you have a nice, smooth paste. With most fillers, you have about 45 minutes before it begins solidifying and is no longer workable.
Step 3: Fill the gaps
Using a filling blade push the filler into the open crack or dent. Smooth it across the gap, pressing in firmly to make sure it's filled in properly. Be generous with the filler. Don't worry about overflow or if it looks messy.
Step 4: Let the filler dry and sand down
Different fillers take different lengths of time to dry up. You should give the filler at least 4 hours to dry but if you want to be absolutely certain, give it half a day. As the filler dries, it may sink inwards. If it does, use a little more filler to fill in the gap. Again, let it dry out. When you're sure the filler has dried, use some fine grade sandpaper to sand it back so it's nice and smooth.
Step 5: Paint
This is the easy, fun part. Paint over the sanded area for a beautiful finish to your wall repair!
I've fixed the cracks but now they're back
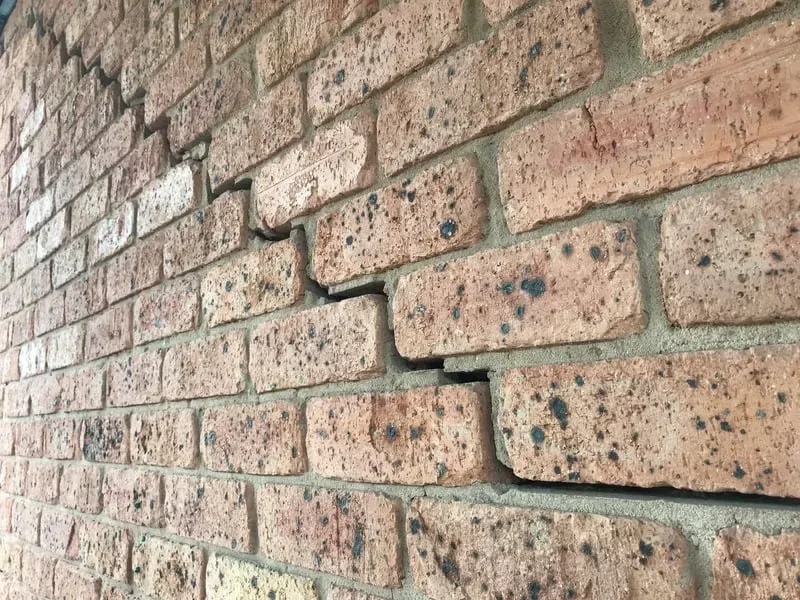
Cracks or dents can appear at any time for a wide variety of reasons. Sometimes it's as simple as a seasonal change. On other occasions, the reasons go deeper — the source could be a shift in your home's foundations due to eroded soil, or poor construction. If the cracks keep coming back after filling, they may be structural wall cracks that need reinforcing, not just filling. A free assessment will tell you for sure.
Share this article
Related Articles
How to Tell If a Wall Crack Is Cosmetic or Structural
Wall cracks are common in Australian homes, but not all mean something's wrong. Some are harmless signs of natural settling or aging materials.
Read More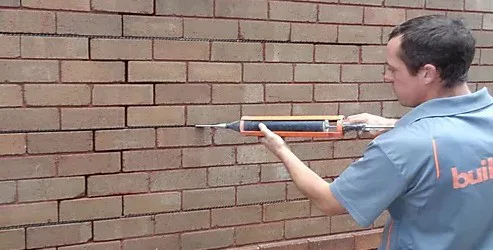
Brick Repair: How to Repoint Your Brick Wall
When the mortar joints between the bricks in your home begin aging, they crumble and crack. Repointing is something you can do yourself. Here’s our step-by-step guide.
Read More
Need expert advice on your home?
Our team of engineers and technicians are ready to help.
Book a free structural assessment today.